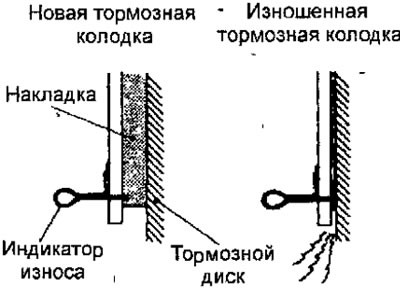
Note. The brake pads are equipped with wear indicators, which, touching the brake disc, when the brake pad thickness is less than 2 mm, emit a squealing sound during braking, warning the driver to urgently replace the brake pads (fig 15.18).

Pic. 15.18. Brake pad with wear indicator
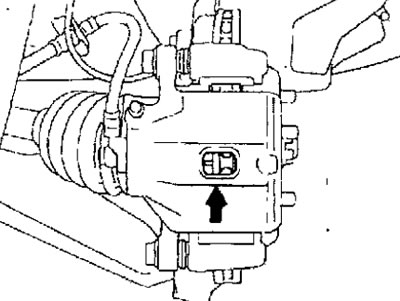
1. Check the thickness of the friction linings of the brake pads through a special inspection hole in the caliper (pic. 15.19).

Pic. 15.19. Checking the thickness of the brake pads through the inspection hole in the caliper
Thickness of brake pads
- nominal: 10 mm
- minimum allowable: 2.0 mm
Warnings
- (1) Be sure to replace all pads on the same vehicle axle, even if only one pad is worn.
- (2) If there is a significant difference between the thickness of the left and right brake pads, check the condition of the working brake cylinder piston and guide pins.
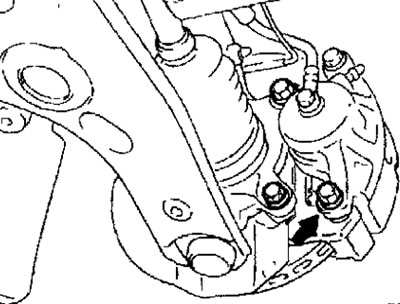
2. Remove the lower guide pin bolt from the caliper, lift the caliper up and secure it to the front suspension strut with soft wire (pic. 15.20).

Pic. 15.20. Location of the lower guide pin bolt
Warning. Do not wipe off the special grease from the surface of the guide pin and do not allow it to become contaminated.
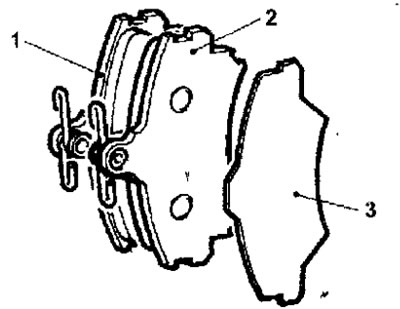
3. Remove the brake shoe with wear indicator, brake shoe and outer gasket (pic. 15.21).

Pic. 15.21. Front brake pads: 1 - brake shoe with wear indicator, assembly; 2 - brake shoe; 3 - outer gasket
4. To determine the resistance to rotation after installing new brake pads, measure the resistance to rotation of the wheel bearing without brake pads.
5. Install the brake pads and caliper, then measure the rotational resistance force.
