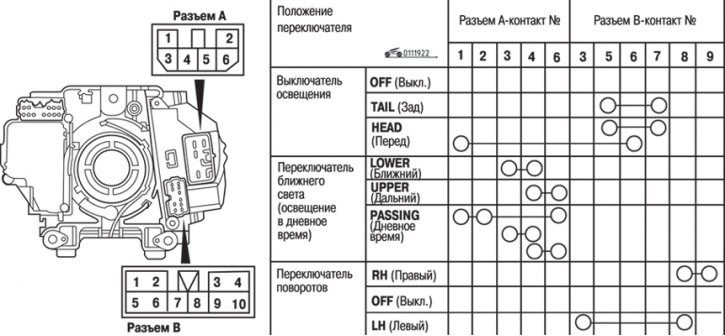
Pic. 19.22. Checking the light switch, dipped beam switch and turn signal switch: 1 - closed conclusions when the dipped beam is on («Lower»); 2 - closed conclusions when the main beam is on («Upper»)
1. Disconnect the electrical connectors from the switch and check the condition (closed or open) electrical circuits between the contacts, which must correspond to those shown in fig. 19.22. Take measurements at all switch positions.

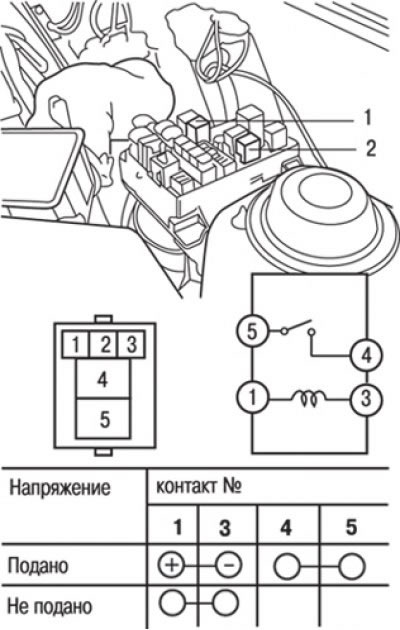
Pic. 19.23. Location and test of the headlight and taillight relay: 1 - rear light relay (vehicles with daytime running lights); 2 - headlight relay
2. Remove the headlight and taillight relay from the relay box and check the condition (closed or open) electrical circuits between the contacts, which must correspond to those shown in fig. 19.23.
3. Check up a condition of contacts of switches and the relay. If the contacts are oxidized, clean them.
4. If the electrical circuits are not in the correct condition, replace the switch.

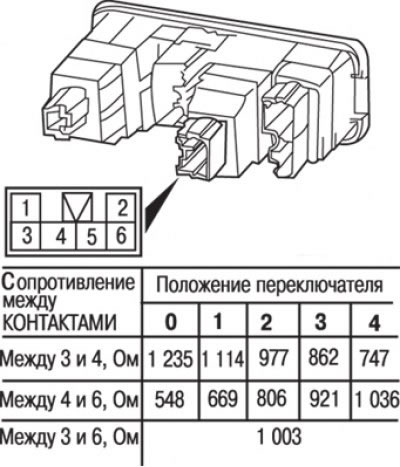
Pic. 19.24. Checking the headlight range control switch
5. Check the resistance of the headlight range control switch between the switch contacts (pic. 19.24).
