Disassembly
To disassemble the master brake cylinder, perform the following steps in sequence.

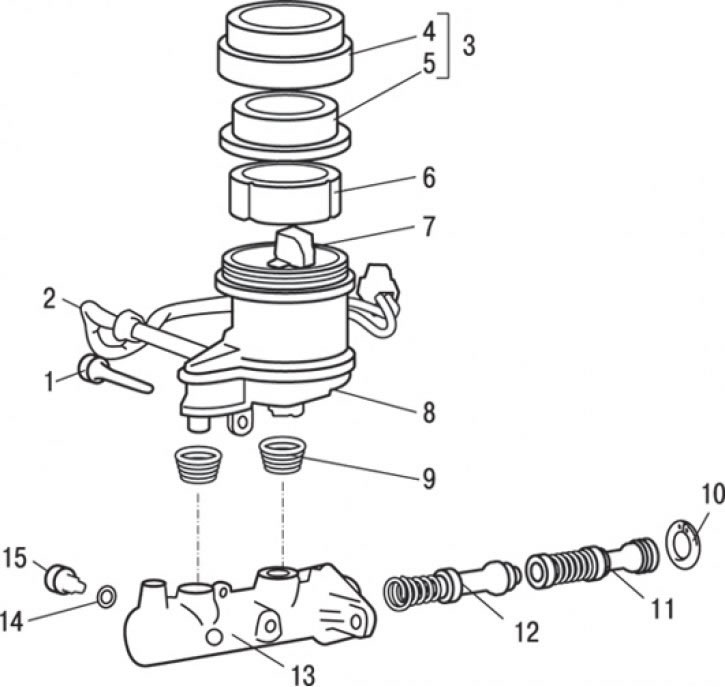
Pic. 14.16. Master brake cylinder: 1 – a lock bolt of a tank; 2 - brake fluid level sensor; 3 - tank cover assembly; 4 - tank cover; 5 - diaphragm; 6 - filter; 7 - float; 8 - tank; 9 - sealing sleeve; 10 - piston retaining ring; 11 - primary piston assembly; 12 - secondary piston assembly; 13 - the body of the main brake cylinder; 14 - sealing ring; 15 - piston lock bolt
1. Remove cover 3 (pic. 14.16) jar assembled.
2. Remove cover 4 from the tank.
3. Remove diaphragm 5.
4. Remove filter 6.
5. Remove the gauge of 2 levels of a brake liquid.
6. Remove float 7.
7. Turn away a lock bolt of 1 tank.
8. Remove tank 8.
9. Remove the sealing sleeve 9.

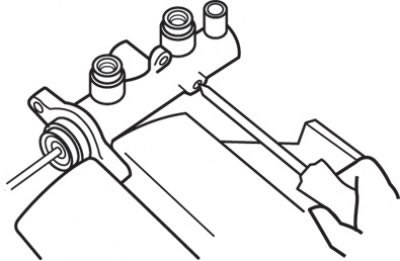
Pic. 14.17. Unscrewing the piston lock bolt
10. Loosen the piston stop bolt while pressing the piston (pic. 14.17).
11. Remove sealing ring 14 (see fig. 14.16).

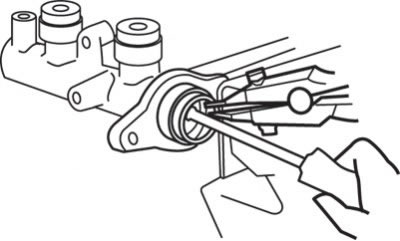
Pic. 14.18. Removing the piston retaining ring
12. Remove the piston retaining ring while pressing the piston (pic. 14.18).
13. Remove primary piston 11 (see fig. 14.16) assembled.
14. Remove secondary piston 12 as an assembly.
Examination
1. Check the inner surface of the brake master cylinder housing for corrosion or metal spalling.
2. Check pistons for signs of corrosion, scuffing, wear or damage.
3. Check the diaphragm for cracks or wear.
Assembly
Assembly is carried out in the reverse order of disassembly, taking into account the following.

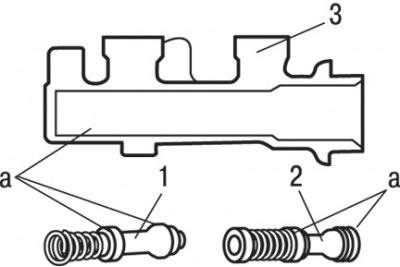
Pic. 14.19. Places (A) applying DOT 3 or DOT 4 brake fluid before installing the pistons in the brake master cylinder: 1 - secondary piston assembly; 2 - primary piston assembly; 3 – the case of the main brake cylinder
Before installing the pistons in the master cylinder, lubricate them and the cylinder walls with DOT 3 or DOT 4 brake fluid (pic. 14.19).
