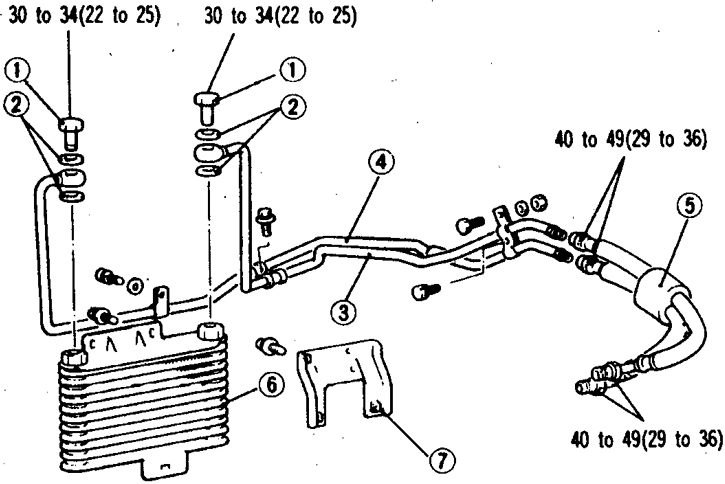
Oil cooler for 4-cylinder engines

1. Bolt union fitting; 2. Gasket; 3. Outlet side tubes; 4. Pressure side pipes; 5. Hoses; 6. Oil cooler; 7. Bracket
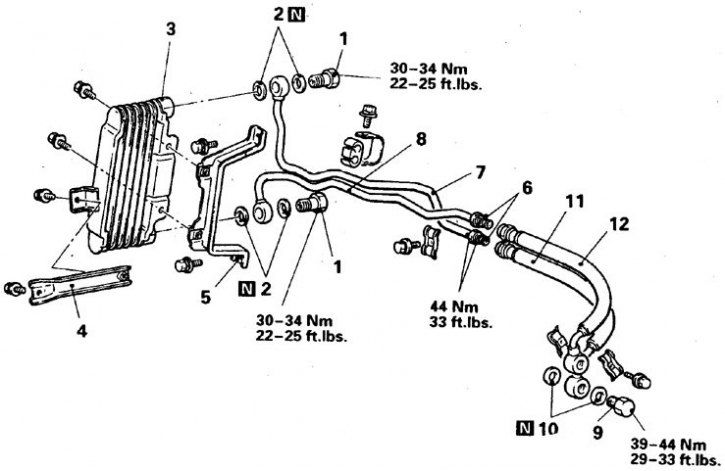
Oil cooler for 6-cylinder engines

1, 9. Bolt union fitting; 2, 10. Gaskets; 3. Oil cooler; 4. Rack; 5. Bracket; 6. Fitting; 7. Pressure tube; 8. Outlet pipe; 11, 12. Hoses
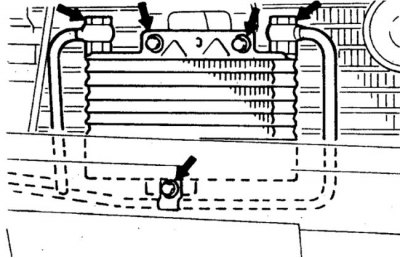
The location of the bolts for fastening the pipes and the oil cooler of 4-cylinder engines

Mounting bolts - indicated by arrows
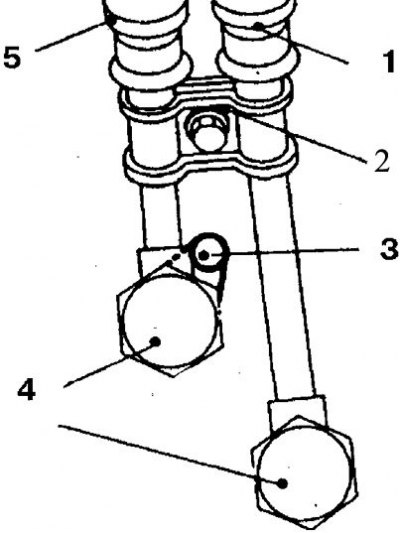
Proper location of pressure and outlet pipes during assembly

1, 5. Hoses; 2. Clamp; 3. Limiter; 4. Bolt union fitting
Removal and installation
1. Disconnect the battery from the ground.
2. Drain the oil.
3. Remove the front facing.
4. Turn away bolts of unions, holding the welded nut on the cooler body with a wrench. Take out the pads.
5. Turn away bolts and remove an oil cooler.
6. Disconnect hoses and tubes from the oil cooler.
7. Check the condition of the cooler fins and tubes. Replace or repair if necessary.
8. When installing, do the following. On 4-cylinder engines: long hose (release side) install at the top, and the short one at the bottom. On 6-cylinder engines: first tighten the exhaust hose fitting bolt, then the intake hose fitting, then tighten the pressure clamp bolt.
9. Further installation is performed in the reverse order. Warm up the engine and check the oil level.
