Brake caliper

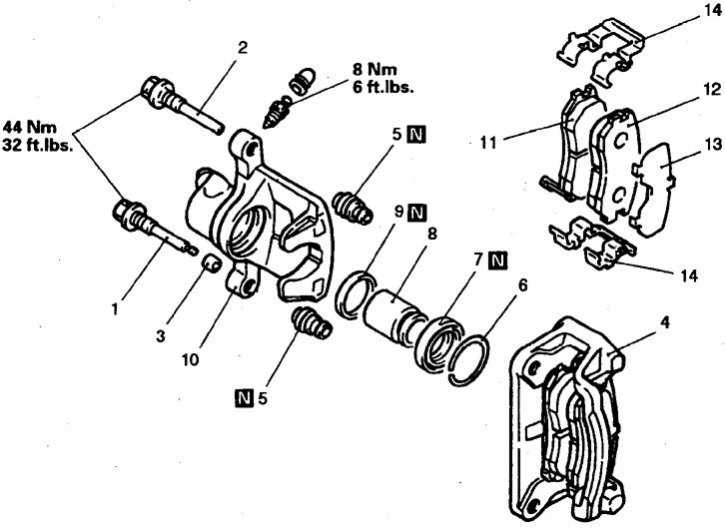
Disassembly order:; 1. Lower finger; 2. Axis; 3. Sleeve; 4. Caliper assembly; 5, 7. Case; 6. Ring; 8. Piston; 9. Seal; 10. Body
How to remove pads:; 1. Lower finger; 2. Axis; 3. Sleeve; 4. Caliper assembly; 11. Pads with indicator; 12. Block; 13. Outer plate; 14. Staple
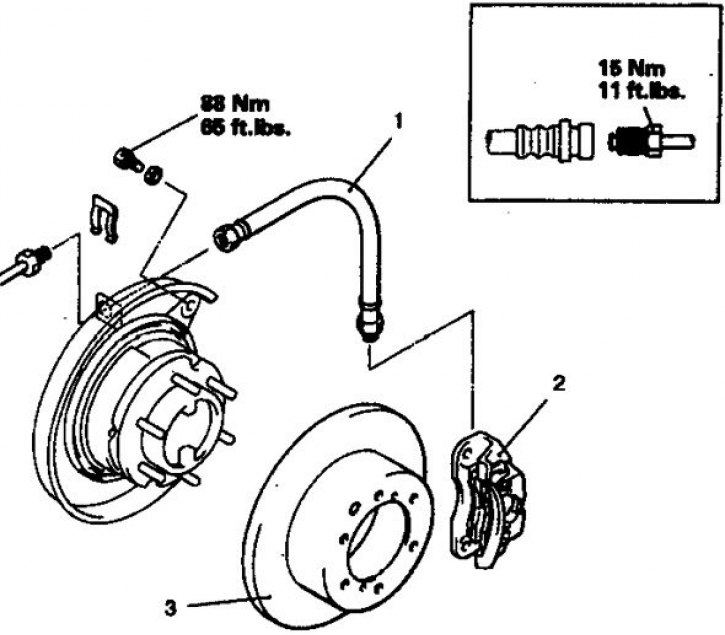
Brake caliper (withdrawal procedure)

1. Hose; 2. Caliper assembly; 3. Disk
Caliper lubrication points during assembly

1. These cavities contain a special lubricant that cannot be removed.
The caliper must be removed on each wheel individually.
Removal and installation
1. Raise the front of the car and remove the wheel.
2. Remove some of the liquid from the tank.
3. Disconnect the brake hose on the caliper, plug the holes.
4. Turn away an axis and a finger and remove a support. You can also remove the caliper assembly with the bracket, for which you need to unscrew the 2 bolts that secure the bracket to the brake shield.
5. Installation is carried out in the reverse order, taking into account the following.

6. Push the piston into the cylinder.
7. Tighten the connections to the following torques: caliper bracket mounting bolts (if filmed) - 90 Nm, axle and caliper pin 32–42 Nm. (upper), hose fitting - 17 Nm.
8. Remove air from the hydraulic actuator.
Disassembly and assembly
1. Remove the cover.

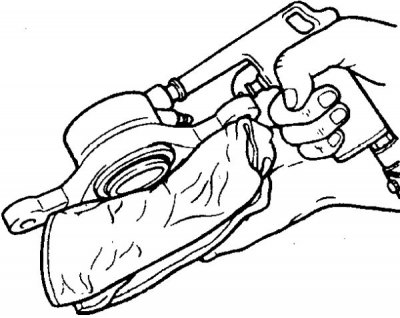
2. Carefully remove the pistons with compressed air.

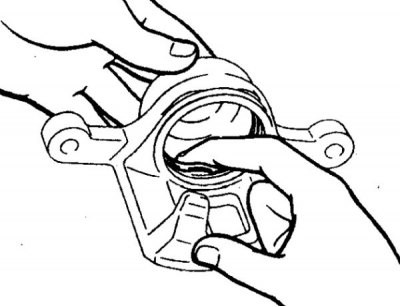
3. Carefully remove the cuff from the cylinder.
4. Check up a condition of pistons and an internal surface of the cylinder.
5. If corrosion or visible damage is found, replace the parts. The caliper repair kit includes seals and a piston (also available separately), as well as grease for the caliper pins.
6. Assembly is carried out in the reverse order.

7. When assembling, install the axle and lower pin in the places marked with the letters G and L (1 - caliper axis, 2 - pin, 3 - letters for proper assembly).
8. Replace all seals.
9. Grease a support and fingers. Lubricate the piston with brake fluid.
