Operations before valve removal and after valve installation
Drain and fill with coolant.
Remove (install) air filter.
Remove (install) thermostat.
Component Removal Sequence
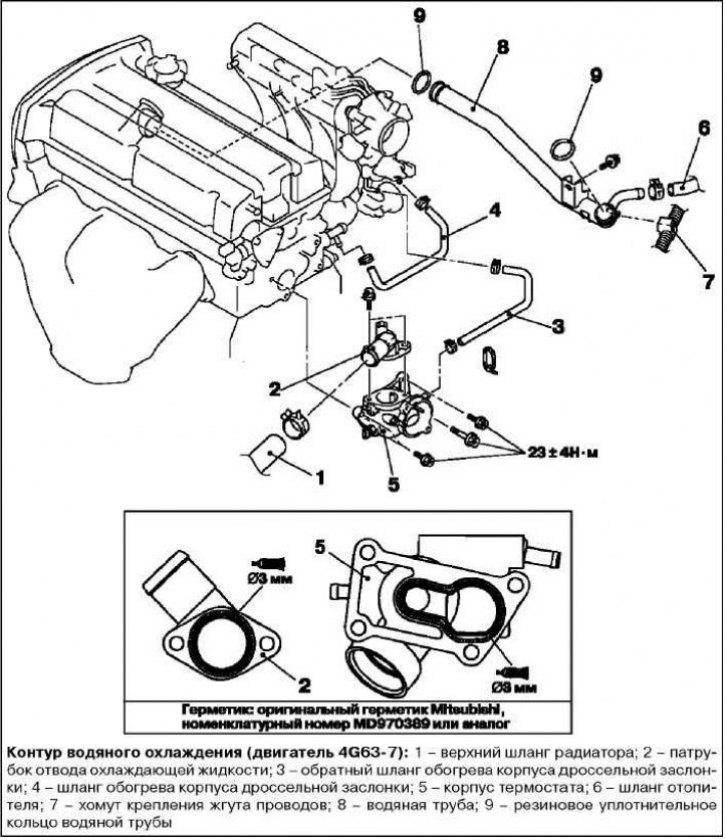
Disconnect the upper radiator hose.
Remove the coolant outlet pipe.
Disconnect the throttle body heating return hose.
Disconnect the throttle body heating hose.
Remove the thermostat housing.
Disconnect the heater hose.
Disconnect the wire harness clamp.
Remove the water pipe.
Remove the water pipe rubber o-ring.
Disconnecting the upper radiator hose

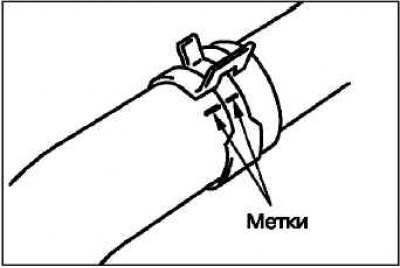
Put a pairing mark on the upper radiator hose and on the clamp. Then disconnect the upper radiator hose.
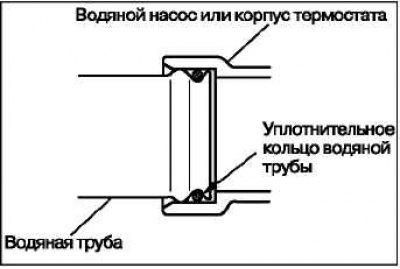
Installing the water pipe rubber o-ring
Attention! Do not allow oils to come into contact with the surface of the rubber o-ring. Insert the rubber o-ring into the groove on the water pipe. Moisten the surface of the rubber ring with water or coolant.
Installing the thermostat housing/outlet pipe

Use a scraper or wire brush to remove any old sealant from the sealing joint.
Apply a narrow strip of sealant to the joint.
Sealant Name: MITSUBISHI Genuine Sealant Part Number MD970389 or equivalent.
Within 15 minutes after applying the sealant (the sealant should not have time to polymerize) Install the thermostat housing or outlet pipe to the engine. Do not apply excess sealant to the joint.
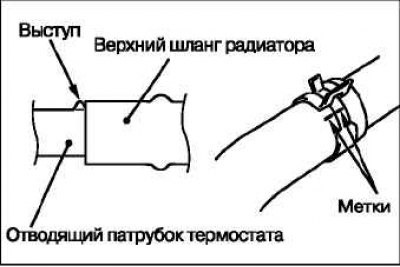
Connecting the Upper Radiator Hose

Push the upper radiator hose all the way into the ledge of the outlet pipe.
Align the mating marks on the upper radiator hose and clamp.
Tighten the clamp.
Checking the water pipe and throttle body heating hoses
After removal, check the water pipe and heating hoses for cracks, damage and blockage.
Replace defective components if necessary.
