Comply with the traffic regulations in force in the specific region regarding the safety of the emergency vehicle, i.e. turn on the hazard warning lights, install an emergency stop sign at an appropriate distance from the car («triangle»), flashing hazard warning light, etc. All passengers must leave the car.
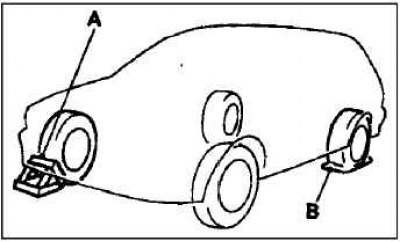
Park the vehicle on a level, firm surface and apply the parking brake. To prevent the vehicle from moving when the vehicle is jacked up, install a brake shoe (thrust block) under wheel A, located on the opposite side diagonally with respect to the replaced wheel B.
Attention! Before installing the jack, make sure that the brake shoe or chock is placed under the wheel. If the vehicle moves while it is being raised, the jack may come out from under the body and cause an accident.
Note. The brake shoe shown in the picture is not included with the vehicle. It is recommended to purchase it separately for use when needed.
If you don't have a brake shoe, place a stone or other suitable object under the wheel that can hold the wheel in place.
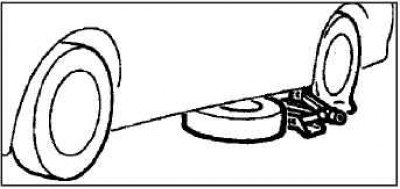
Take out the spare wheel, prepare a jack and a wheel nut wrench (balloon wrench).
Note. Place the spare wheel under the car body near the jack. This will reduce the danger if the jack breaks.
On a vehicle with wheel covers, loosen the wheel nuts using a wheel nut wrench. Do not remove the wheel nuts at this stage.
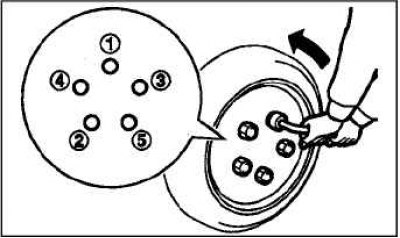
Raise the vehicle with a jack until the flat tire is slightly off the ground.
Loosen the wheel nuts with a wheel nut wrench or by hand, then remove the wheel.
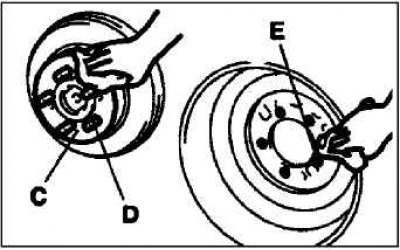
Remove dirt, etc. from the surface of the hub C, from the studs D of the hub and from the holes for the studs E in the wheel rim, and then install the spare wheel on the hub.
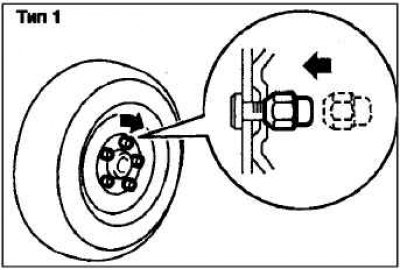
If the wheel disk is made of steel (type 1), install the wheel nuts with the tapered end towards the wheel and tighten them by hand until the wheel has no play.
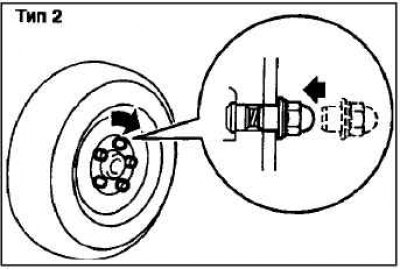
If the wheel rim is made of aluminum alloy (type 2), then temporarily tighten the nuts by hand until the flanges of the nuts come into contact with the wheel disk, so that the latter has no play.
Note. Temporary installation of flanged wheel nuts is allowed (type 2) on a steel rim, but the original rim and tire should be installed as soon as possible.
If all four wheels on a vehicle with aluminum rims and flanged wheel nuts (type 2) change to wheels with steel rims, flare wheel nuts should be installed (type 1).
Attention! Never lubricate wheel studs or wheel nuts with oil, as this may cause them to be overtightened.
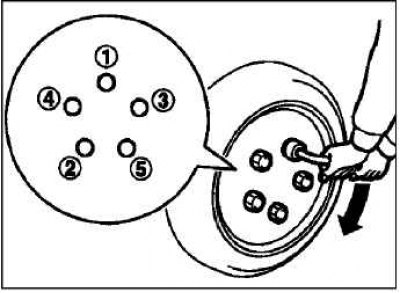
Slowly lower the vehicle and then, one at a time, in several steps, tighten all wheel nuts to the specified torque.
Tightening torque: 98–108 Nm. (The torque is achieved by applying a force of approximately 360 to 420 N on the end of the wheel nut wrench supplied with the vehicle.)
Attention! When tightening the wheel nuts, it is forbidden to step on the wrench with your foot or lengthen the wrench with a pipe, as this can lead to overtightening of the nut.
Lower the jack, remove it from under the car. Remove the jack, mount and wheel with a flat tire to the places of regular storage. Repair it as soon as possible.
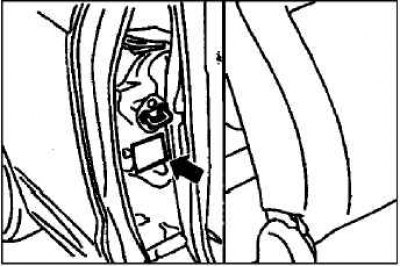
Check tire pressure. The correct tire pressure is indicated on a sticker located on the pillar on the driver's side.
