Removing
lift the car, see par. 29.
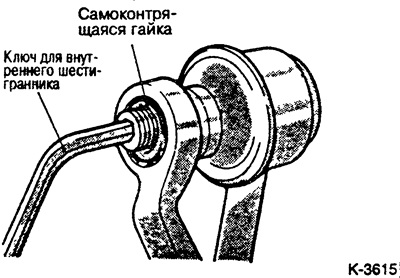
Unscrew the stabilizer from the connecting element (screeds). While doing this, hold the hinge with a hexagon socket wrench.
Unscrew connecting piece from transverse link.
Attention: On cars produced from January 1984 to August 1988, the stabilizer is connected by bushings with a through bolt, ball plates and rubber bearings.
Loosen, without unscrewing, ball joint nut -3-.

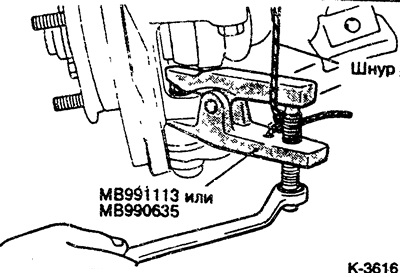
Press ball joint out of steering knuckle. At the same time, attach the release tool to the body with a cord.
Release front mounting -4- for control arm.

Loosen nut -3- and remove transverse link -7-.
Examination
Check the absence of wear and damage to the silent blocks, otherwise replace.
Check the transverse arm for distortion or breakage, otherwise replace.
Check for damage to the clamp, otherwise replace.
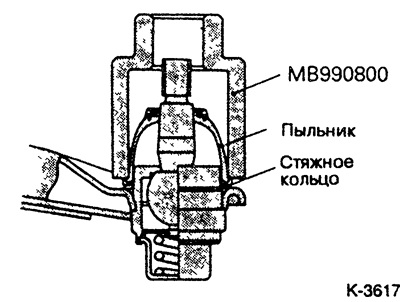
Check ball joint boot for cracks, otherwise replace. Before installing, apply multipurpose grease to the sealing lips and to the inside of the boot.

Use a special tool Mitsubishi MB990800 to drive the boot to the stop. If a special tool is not available, a tube of the appropriate diameter can be used.
Check that all screws are in perfect condition and replace if necessary.
Installation
Caution: Be sure to replace the self-locking nuts.
Insert transverse link, tighten all bolts and nuts.
Attention: Tighten nut -4- only, do not tighten.
Attach the stabilizer link to the transverse arm.
On vehicles manufactured from 1.84 to 8.88, attach the stabilizer with bushing and rubber mounts to the transverse arm. Screw the fastening nut so that the thread outlet of the through bolt is 21-23 mm.
Attach the cross stabilizer.
Lower the car.
Pump the front of the car several times to shrink the front suspension.
Tighten transverse link to body to 120 Nm.
Attention: In this case, the car must be on the ground on 4 wheels.
If possible, check the front wheel alignment at a service station as soon as possible.
