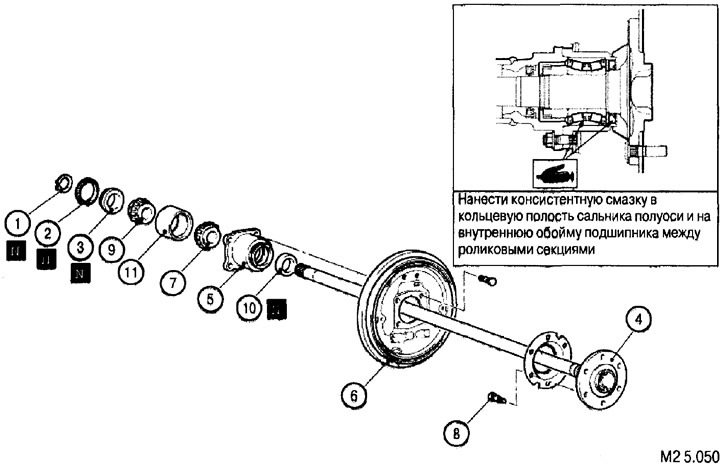
Structural elements of the rear axle shaft: 1. Thrust ring (replace with a new one when reassembling); 2. ABS rotor (for vehicles equipped with ABS); 3. Lock washer (replace with a new one when reassembling); 4. Vag of the rear axle; 5. Bearing housing; 6. Brake shield; 7. The inner race of the outer bearing with rollers and cage; 8. Bolt of fastening of a nave; 9. The inner race of the inner bearing with rollers and cage; 10. Oil seal (replace with a new one when reassembling); 11. Outer race of bearings
Disassembly is carried out in the order indicated in Fig. M2 5.050. Assembly is done in the following order: 11, 10, 9, 7, 8, 6, 5, 4, 3, 2, 1.
Removing the thrust ring
To replace the axle shaft bearing, it is necessary to remove the thrust ring that keeps the bearing from slipping along the axle shaft, that is, from the spontaneous exit of the axle shaft from the rear axle while driving. Removal by pressing is unacceptable, since the thrust ring sits during assembly with preheating, and when it is pressed, the seating surface of the axle shaft will be damaged. In this case, after installing a new thrust ring, the reliable fit of the bearing on the axle shaft will not be guaranteed.
Removal of a persistent ring is made by a method of its destruction.
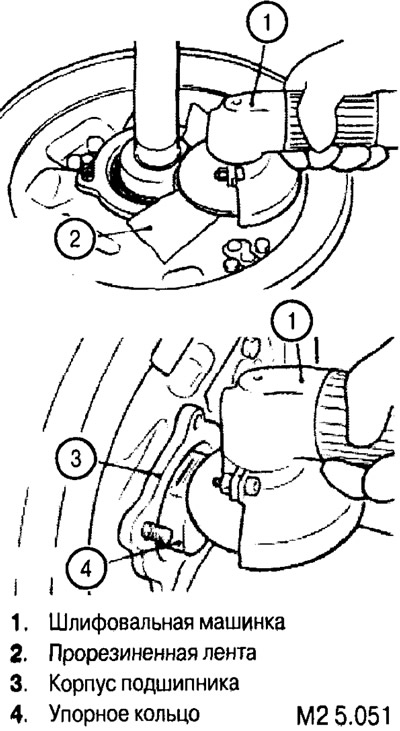
Before starting work, to protect the bearing housing, protect its end surface with a rubberized tape.
Using a grinder, locally grind the walls of the thrust ring around the circumference to a thickness of 2.0 mm.

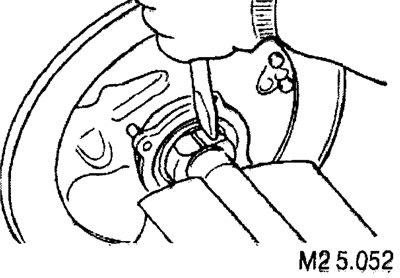
Having fixed the shaft, it is necessary to destroy the thrust ring with a chisel.

Attention; be careful not to damage the axle shaft surface. Even superficial damage can cause the axle shaft to break while driving.
Installing the lock washer
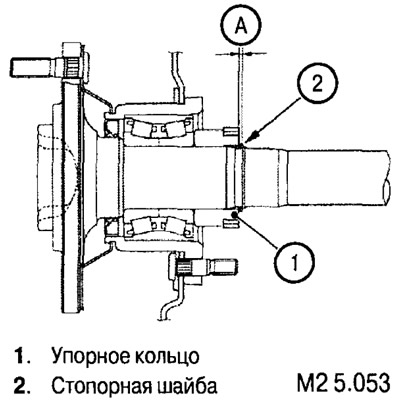
After installing the lock washer, measure clearance A (see fig. M2 5.053). The standard value of A is from 0 to 0.166 mm. These lock washers can be used to achieve standard gap A.

| Thrust ring thickness | Thrust ring color |
| 2.17 mm | |
| 2.01mm | Yellow |
| 1.85 mm | Blue |
| 1.69 mm | Violet |
| 1.53mm | Red |
