Examination
1. Raise the vehicle and place it on stands.
2. Inspect the covers for cuts, cracks, or signs of leakage and replace if necessary.
3. Try to press the ball joint up or down, if it succeeds, then the ball joint is worn out.
4. Have an assistant shake the wheel and touch the ball joint nut. If it moves, the ball joint shank is worn or the hole in the stub axle is worn. In this case, the trunnion or joint must be replaced.
Replacement
5. Raise the car and remove the wheel.

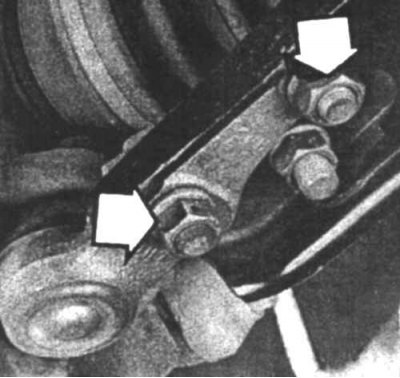
7.6 The ball joint is attached to the suspension arm with two bolts and nuts (indicated by arrows) (Precis only)
6. Unscrew the bolt securing the ball joint to the lever, but do not remove it yet (7.6).

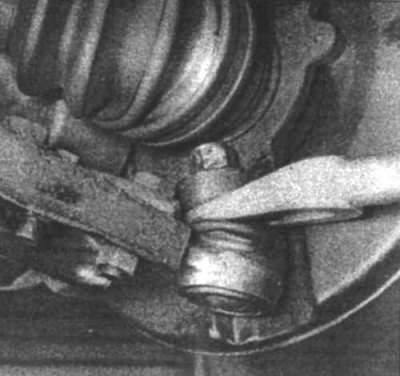
7.7 To disconnect the ball joint from the pivot pin, use a special puller - pre-lubricate the boot
7. Loosen the nut on the ball joint shank a few turns. Disconnect the ball joint from the stub axle (7.7) and remove the nut.
8. Remove the two bolts securing the ball joint to the suspension arm and remove the ball joint.
9. To install the ball joint, install it on the suspension arm and install the two mounting bolts. Do not tighten the bolts yet.
10. Insert the ball joint shank into the stub axle and tighten the nut to the correct torque.
11. Tighten bolts of fastening of the spherical hinge to the suspension arm to the demanded moment of an inhaling.
12. Install the wheel and lower the vehicle to the ground.
